Overview
 |
The Displacement Map effect shifts or displaces the pixels on the background layers based on the color of pixels in a map layer. |
The Displacement Map effect should be applied to the map layer, which in turn should be placed in front of the background layer or layers to be displaced.
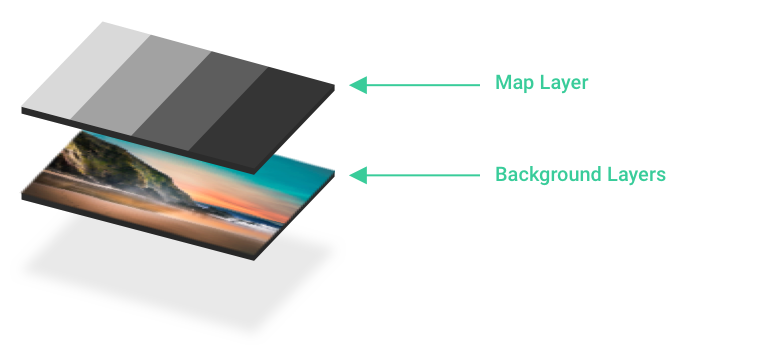
The overall displacement is calculated by combining the Offset settings in the effect with the color of the pixel in the map layer. By default, the pixel luminance is used. Brighter pixels cause a larger shift; darker pixels cause a smaller shift (black pixels cause no shift at all).

Fig 1. Animated Vertical Offset
Consider Fig.1: On the left you can see the background layer. In the center, the map layer is overlaid with no effect applied. On the right, the Displacement Map effect has been applied to the map layer, and the Offset is being animated up and down along the Y axis.
As you can see, the white area moves furthest, while the black area does not move at all.
This behavior can be customized by adjusting certain settings.
From Center changes the behavior so that white pixels shift in one direction, black pixels shift in the opposite direction, and neutral gray pixels don't move.
Invert causes the offset to be reversed (the behavior of black and white is swapped)

Left: Normal; Middle: From Center is enabled; Right: Invert is enabled.
Ideas
Displacement Map is a very versatile effect. It can be combined with other effects to create some very interesting results.
Wipe + Displacement Map
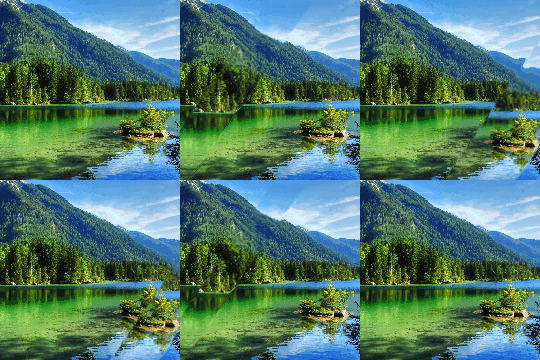
Here, the Wipe effect is combined with Displacement Map to create a sliding ripple.
Here's how:
- Create the background layer
- Create a blank white layer in front of the background (this will be the map layer).
- Apply the Wipe effect to the mask layer, using keyframe animation on the Start and End positions (in the example here, we also adjusted the angle).
- Optionally, apply a Box Blur to the map layer (blurring the edges of the map causes a refracted look along the edges, giving more of a glassy look).
- Finally, apply the Displacement Map to the map layer and slightly adjust the offset.
Ripple / Energy Burst
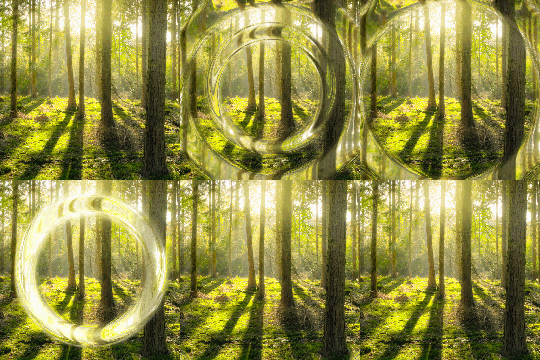
Here, we use a plain circle with a white outline and no fill, together with a Box Blur and a Displacement Map to create the ripple on the left; change the layer blending mode to screen for the energy burst look on the right.

Here's how:
- Create the background layer.
- Create a circle layer in front of the background (this will be the map layer).
- In Color & Fill turn OFF the fill using the icon on the left:

- In Border & Shadow turn ONN the Outline Center option, set the color to white and the thickness to something large (say, 80).
-
VERY IMPORTANT: Normally, outline and borders are applied after all effects. But we want to use the outline itself as a map. There's a trick to do this: Put it in a group all by itself, the apply the effect to the group. Here's how: Long-press the circle layer header tab at the left end of the timeline to select it (it will look like this:
 ) then tap the group
  icon at the top of the screen to make a group with just the circle.
 - Select the map layer group and apply a Box Blur effect (we used a strength of about 0.4, but you can adjust as you like).
- Apply a Displacement Map effect to the map layer group.
- Use Move & Transform to apply a keyframe animation to the size of the map layer group, so that it grows from the center to the edge. (In the example, after this, we duplicated the layer and moved the duplicate a little later in time, for multiple rings)
Fake 3D Parallax
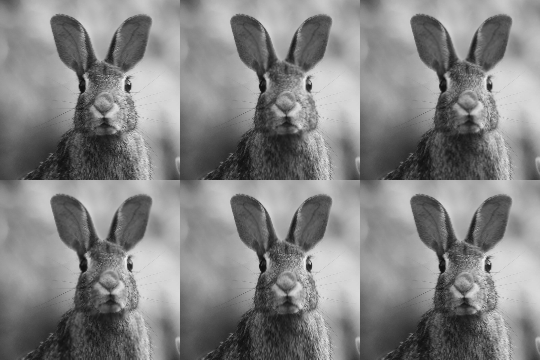
Here, a still image is brought to life by creating a depth map using Freehand Drawing, then applying a Displacement Map to displace pixels based on their depth.
A depth map is a layer where pixel brightness indicates the distance of a pixel from the viewer (the depth into the scene). While pixels are closer to the viewer (or camera) and black pixels are further.
Here, we started with a still image of a bunny:

We then using Freehand Drawing to very roughly sketch out the parts of the image in gray tones based on their distance (forgive our drawing skill: It doesn't need to be good for the effect to work).

We then apply a Box Blur effect to smooth out the edges (and hide our bad drawing skill).

This is our depth map. We then apply a Displacement Map effect to this layer, and animate the offset. (NOTE: Use very small adjustments too offset; otherwise you'll get unwanted distortions in the result).
Glitch Effect
Displacement Map is great for building a variety of glitch effects. Here's just one example:

To make this effect, we first made the RGB separation (this is optional) by creating three identical text layers. We then made one layer red (with a screen blending mode), one layer blue (also with a screen blending mode) and the original layer white. The red and blue layers were then animated to create a simple RGB separation:

We then created a map layer using just a blank square shape, with a series of effects applied to it:
- Clouds (with keyframe animation for the postition)
- Mosaic (with a large square size)
- Mosaic (a second time, with a smaller square size)
- Noise (with "Freeze" turned on and "Amount" set quite low)
This was then grouped and the group was stretched out horizontally to make the mosaic tiles wider rather than square. This resulted in a map layer that looked like this:

The flickering is because of the animation on the Clouds effect (it moves so fast the change appears random).
This map layer is then placed in front of the three text layers, and Displacement Map is applied, using keyframe animation to increase and then decrease the offset over time.
Melt Effect
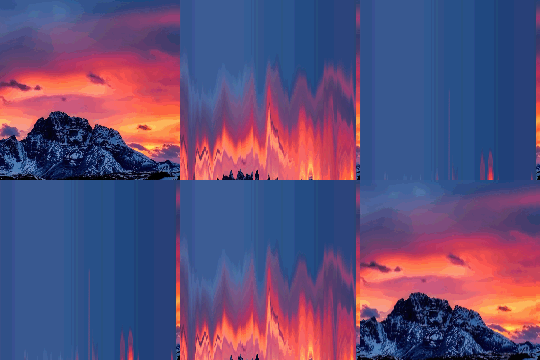
Here, we use a simple map layer: Just Clouds stretched vertically. By animating the offset on the Y axis, we can creating this melting effect.

Parameters Reference

Offset
The maximum amount of displacement along the X and Y axes. The actual displacement is a combination of this and the pixel value in the layer.
Channel
Controls which color channel is used to calculate the offset factor for each pixel. By default, the luminance (the weighted combination of the red, green, and blue channels) is used, but you can select an individual channel (Red, Green, or Blue) in which case only that channel is used to calculate the offset factor.
Edges
Controls what happens when the offset is so large that it goes past the edge fo the project.
Repeat causes the last row of pixels at the edge to repeat (stretching out) forever.
Mirror causes the project content to repeat, but in reverse (mirror image).
Clear causes any data outside the project to be transparent.
Tile causes the project content to repeat in a tiled pattern (similar to Mirror but without reversal)
From Center
Changes the behavior so that white pixels shift in one direction, black pixels shift in the opposite direction, and neutral gray pixels don't move.
Invert
Causes the offset to be reversed (the behavior of black and white is swapped)
Comments
0 comments
Article is closed for comments.